Visual STG Lab |
| Open Source Editor |
Home
References
Screenshots
Software
Download
Install
Developer page
Documentation
Manual
Tutorials
FAQ
Latex
Who are we
Authors
Tutorial 2
Attaching signals and handle tokens
We assume that you have already carried out tutorial 1 in order to follow this tutorial on binding signals to transitions and putting tokens on places.
|
Step 1:
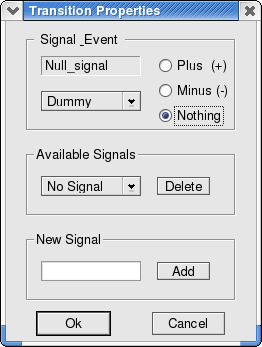
Double-click the top Transition - see figure 1.3 - and a property box will appear as showed in figure 2.1.
1: Enter the signal name "request" in the new signal field. |
|
| Step 2:
Now attach the same "request" signal to the lower Transition.
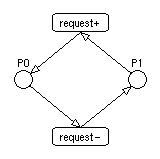
1: Double-click on the lower transition and select "request" from the Available Signals listbox. Now the STG should appear as shown in figure 2.2. |

Figure 2.2 |
|
Step 3:
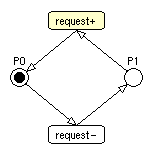
Finally add a token by double-clicking on P1. To simulate the network press the z-key. Transitions just fired are colored to trace events. Note: In versions prior to 0.3.2 the fire key was f. |

Figure 2.3 |
Previous: Return to tutorial 1.
